Once your starter is ready and active, you’re ready to make your first loaf. Here are detailed instructions and a few tips. Remember, we aren’t going to make this with whole grain flour because we don’t know what we’re doing yet and it won’t taste good if you do. Just chalk it off to the cost of learning something new and use bread flour for your first loaf. I want to give credit where credit is due. This recipe was slightly adapted from Emilia Raffa’s Artisan Sourdough Made Simple Everyday Sourdough Recipe.
Suggested Timeline for Your First Loaf
I have created a timeline for starting your first loaf of bread one night and finishing it around mid-morning the next day. I usually start the process on Friday afternoon and enjoy my bread on Saturday. If that’s not the most convenient for you, adjust the times using the guide below as basic parameters.
- Around 4:00-5:00 PM: Feed the starter and set it near your oven or the warmest part of your house
- 9:00 PM (or later 4-8 hours later) Mix the Dough
- 9:30 or 10:00 PM ( or 30-60 minutes later) Get the dough ready for the Bulk Rise. Go to sleep.
- 7:00 AM (or 8-12 hours later) Shape the dough and let it do the Second Rise
- 8:00 AM (or 30-60 minutes later) Score and Bake
- 8:20 AM (or 20 minutes later) Remove the lid from Dutch oven. Bake uncovered for 30 minutes
- 8:50 AM (or 30 minutes later) Remove the bread from the oven and turn the oven off. Let it cool for about an hour.
- 9:50 AM (or an hour later) Put some strawberry jam on that bread and enjoy in your first bite of homemade sourdough
So yes, it takes roughly half a day to make sourdough bread, but most of that time is spent waiting or sleeping. You are going to spend 10-20 minutes (split up into four 1-5 minute chunks) standing in front of the bread. It’s easy to overdramatize this situation in your head. Please don’t. Just think of it as something you’re going to do before you go to bed for a few minutes.
First Loaf Ingredients and Supplies
(You can deep dive the options and alternatives here.)
Equipment
- Mixing bowl
- Spatula or dough whisk
- Clean, wet kitchen towel
- Scale (optional but suggested)
- Dutch oven
Ingredients
- 1/4 cup or 60 grams bubbly, active starter (if you accidentally pour more in–like I always do–don’t worry. Keep it under 100 grams and you’re good)
- 350 grams or 1 1/2 cups lukewarm water (again, don’t worry if you go over a little bit and keep the water truly lukewarm–you don’t want it so hot it kills the yeast)
- 500 grams or 4 1/4 cups bread flour
- 9 grams or 1 1/2 tsp fine sea salt
Step 1: Feed your starter
I put this as a standalone in the recipe because it takes some of the mystery out of starting. You might already have an active and bubbly starter. If so, feel free to skip this step. A big key to sourdough success is to start with a starter that is at its most active (or highest point) in the jar which is somewhere around 4-8 hours after you feed it. So start the next step once your starter has risen and is bubbly and puffy. Don’t be a perfectionist waiting for the exact highest point. This is no-drama sourdough and we aren’t perfectionistic here. Just make sure it’s bubbly and puffy and higher than it was.
Step 2: Mix the dough
This will take about 3-5 minutes then you will wait for 1/2 hour to 1 hour.
- Whisk the wet ingredients (water and starter) together first with a fork, whisk, or spatula.
- Add the flour and salt right on top of that and then combine them all until a shaggy dough forms and all the flour is integrated into the dough. By shaggy I mean not smooth, not artisan at all yet. It will feel wet. I usually have to use a fork to scrape the dough off my mixing utensil. Some people use their hands to really incorporate everything together. If you do that, just know it helps to put a little flour on your hands first to keep it from getting so sticky. You’ll become a better baker if you notice all of this.
- How does the dough look? Wet, smooth, sticky
- How does it feel?
- Cover your dough with a wet towel. If you’re doing this in the morning, go get ready for your day. If you’re doing this at night, put your kids to bed, clean your kitchen, or wind down. It will need to sit (or rest) for 30 minutes to an hour. Congratulations, you just mixed your first loaf of bread.
Step 3: Get the dough ready for a Bulk Rise
This will take 2-5 minutes and then you will wait for 8-12 hours before you do anything else.
Notice the dough: After your dough has rested for 30-60 minutes, uncover it and take a minute to just notice it. It will look a little bit different than it did when you first mixed it, but just a little. It might be a little more relaxed and even seem less shaggy. Part of being a good baker and a mindful person is just noticing some of these little details. That’s the part I enjoy about sourdough. You learn to be a little more attentive.
Work it: Now you’re going to work the dough into a smoother ball. Some people refer to this as the first “stretch and folds”. I mentally divide the dough into four parts (almost like a pie). Your goal here is to fold each “part” over to the other side.
- Get your hands good and covered with flour.
- Pick up a small amount from the edge of the dough and fold it over to the other side. Reflour your hand if you need to at this point and grab the side to the right of where you started. Your dough is not paper, so it won’t fold flat. But as you do this, it should start to look more like a ball of dough. This should take 15-30 seconds. You aren’t kneading it.
- Cover it with your damp, clean cloth.
Good job. If it’s nighttime, you can go to bed. If it’s morning, you can go to work. You won’t need to interact with this bread for 8-12 more hours. That’s a big range because every kitchen is different and temperature can have a big impact on how long it takes. That’s why the experts say to watch the dough, not the clock. You’ll know it has risen because it will have doubled in size when it’s ready for the next step.
Step 4: Shape and Second Rise
Sometime between 8 and 12 hours, your dough should have doubled in size. Once that happens, you need to stretch it out, shape it, and let it rise briefly again before cooking it. This part is messy. You’re going to need some flour. Flour, in fact, is going to be your best friend in this process.
- Put some flour on a clean surface.
- I like to sprinkle a handful of flour around the periphery of the dough and on my hands and then scrape the dough onto the floured surface.
- Do you remember how you folded the dough onto itself in step 2. You’re going to do that again. If you want to lift each part of the dough up a little higher (hence the word stretch) for dramatic effect, you can.
- Put a little more flour on your hands and place your hands on each side of the dough. Move your hand around the dough and pull it toward you as you tighten the shape of the dough up.
- You need to let the dough rest for another hour. Some people line a basket with a fresh towel, pour flour on the towel, and pop it in the basket to rise. Because I’m a minimalist, I just throw some flour in my mixing bowl and (using floured hands) just put it back in the mixing bowl seam side up.
- It will need to rest and rise for another 30 minutes to 1 hour. It won’t double in size this time but it will be a little puffier. If you want, you can start to preheat your oven
Step 5: Score and Bake your First Loaf
The glorious moment has come. It’s time to bake your first loaf of sourdough bread.
- Preheat your oven to 450 degrees. I like to put my Dutch oven in the oven while it’s preheating so it’s nice and steamy when I put the bread in there.
- Set out a piece of parchment paper on the cabinet or pour a handful of cornmeal at the bottom of the Dutch oven. You just need some friction between the bread and the pot so the bread doesn’t stick.
- Once your bread is finished with the second rise dump it onto the parchment paper or directly into a Dutch oven with cornmeal at the bottom. Since we let it rest seam-side up in step four, we should be able to drop it right where we want it and it will land directly into the pot or on the paper with the seam down.
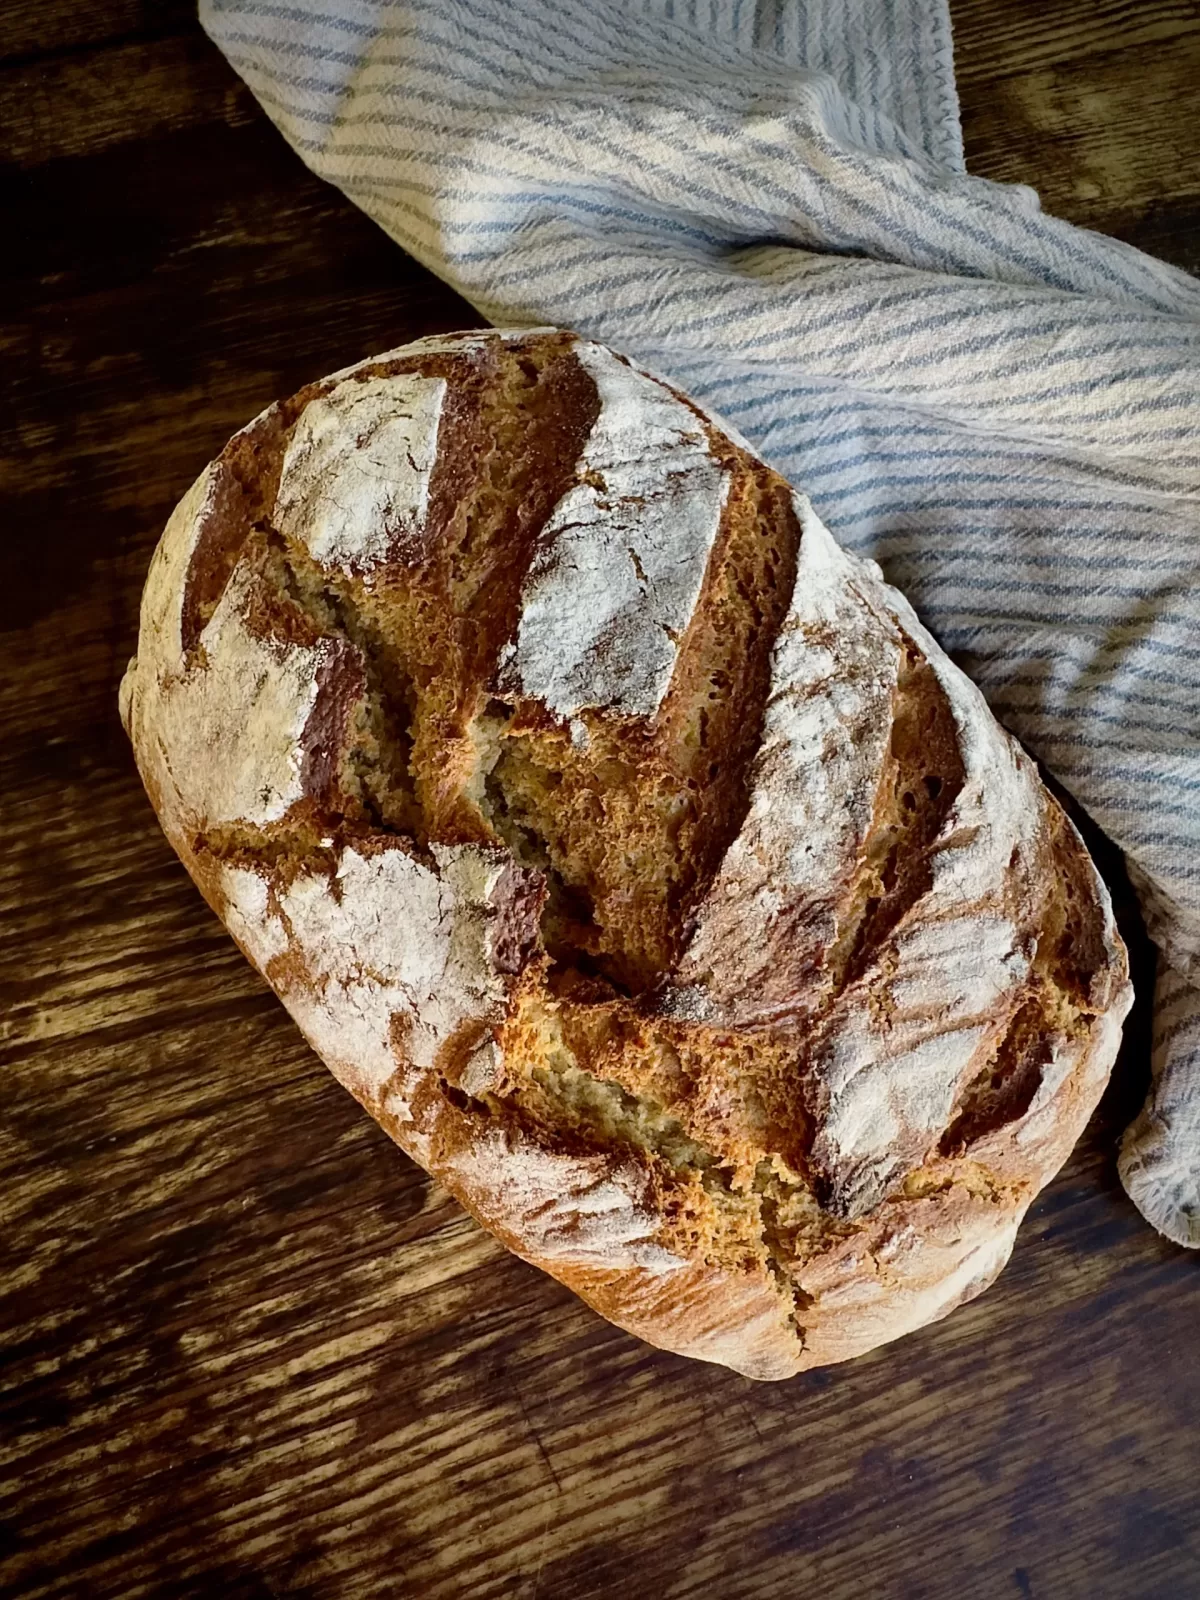
- Now you can “score” it or cut the bread. The simplest way to do this is to cut it straight down the middle, but you can also put pretty designs on there. This isn’t just for aesthetics. Scoring allows the bread to spring in a predictable way as it releases gas. (Fun fact: in the old days when people baked at a community hearth, scoring also helped them identify which bread was theirs.)
- It’s time to bake! For the first twenty minutes, you are going to bake the dough with the lid on. If you are cooking in a bread pan without a lid, invert another loaf pan on top of it. If that’s not an option, put a pan of water on the bottom rack in the oven to create the steamy effect. After 20 minutes, take the lid off and let it cook for another 30 minutes.
- Pull it out of the oven and let it cool for an hour. It’s the worst, but if you don’t it will be gummy inside.


I’ve had a starter for months and been intimidated to make an actual loaf. This recipe and timeline broke everything down in a way I could make it work! My first load turned out so beautifully! Thank you so much for sharing!